Gardening Gold: How to Germinate Ranunculus Seeds for a Riot of Color!
Ranunculus seeds offer a unique opportunity for you to bring a burst of color to your garden. Known for their vibrant, multi-layered flowers, ranunculus are a popular choice for gardeners looking to add some cheer to their floral displays. The process of germinating these seeds might seem daunting at first, but with the right approach, you can cultivate healthy plants that will transform your garden into a kaleidoscope of hues.

Before sowing ranunculus seeds, it’s essential to create a suitable environment for germination. The key is to strike a balance in moisture levels—your seed-starting mix should be moist, akin to a well-wrung sponge, to encourage the seeds to sprout without rotting. Adequate drainage is crucial, so always opt for containers with drainage holes. It’s this careful attention to detail in the early stages that paves the way for a garden filled with these delightful blooms.
While ranunculus are often grown from bulbs(also known as a corm), starting them from seeds allows you to witness the full life cycle of these enchanting flowers. Patience is a virtue here, as it will take some time for the seedlings to mature into the lush plants that are the hallmark of ranunculus. With their paper-thin petals and array of colors, these flowers are a joy to grow and will make a lovely addition to your spring-blooming garden setup, alongside daffodils and tulips.

Preparing for Planting
Before diving in, ensure you have the best foundation for your ranunculus seeds to thrive by selecting quality seeds, preparing a suitable location, and optimizing soil conditions.
Choosing the Right Seeds
When starting your garden, choosing the right seeds is crucial for successful germination. Opt for ranunculus seeds that are fresh and meant for the current growing season. Seed packets often come with a viability date; check this to increase your chances of success.
Selecting a Planting Location
Your ranunculus seeds will need a location that provides cool temperatures, as they thrive in cooler conditions. Indoors, consider an area that’s away from direct heat sources but can receive ample light. Utilize resources on starting seeds indoors to identify the perfect spot within your home.
Soil Composition and Conditioning
Ranunculus seeds require rich, well-draining soil that’s fortified with organic matter. To create an ideal growing medium, mix loam-based compost with about 20 percent horticultural grit. This ensures proper drainage and healthy plant roots. For seeds sown directly outdoors, rake the garden soil smooth and consider incorporating seed starting mixtures that promote optimal germination conditions.
Sowing and Germination
Successfully starting ranunculus from seed involves both technique and creating optimal conditions. Let’s walk through the steps to sow your seeds and ensure they germinate effectively.
Sowing Techniques
When sowing ranunculus seeds, it’s important to use shallow seed trays filled with a high-quality seed-starting mix. Sow your seeds 1/4 inch deep in the soil, spacing them about 4-6 inches apart to give each seedling room to grow. After sowing, lightly press down the soil mix and water it until moist, ensuring it’s not waterlogged. A pot with drainage holes is crucial to prevent excess moisture from causing rot.
Optimizing Germination Conditions
Ranunculus seeds germinate best in cooler temperatures, ideally between 50 to 60 degrees F. They don’t require supplemental heat, so avoid using a heat mat, especially if temperatures exceed 68 degrees F. For consistent soil temperature, placing a humidity dome may help maintain moisture, but be mindful to prevent overheating.

Caring for Germinating Seeds
Maintaining consistent moisture is key for germination; the soil should be like a wrung-out sponge. Allow the surface to dry out slightly between watering to avoid over-saturation. Ranunculus seedlings benefit from bright, indirect light, helping increase the germination rate without scorching young plants. As they grow, gentle watering supports the seedlings’ needs without disturbing fragile new roots.
By following these straightforward methods and conditions, your ranunculus seeds will have a strong start. For more guidance on seed starting indoors, consider insights from How to Successfully Start Seed Indoors, and for detailed information on soil temperature’s effect on seed germination, explore Soil Temperature Conditions for Vegetable Seed Germination.
Post-Germination Care
After your ranunculus seeds have successfully germinated, it’s vital to shift your focus to post-germination care. This includes establishing proper moisture levels, providing adequate space between plants, and introducing the right nutrients to support healthy growth.
Watering Regimen
Maintain consistently moist soil for your ranunculus seedlings, without over-saturating them. Aim for a watering routine that keeps the soil as moist as a wrung-out sponge. It’s crucial to avoid over-watering, which can lead to mold and disease. For more guidance on maintaining the ideal watering balance, consider learning about starting seeds indoors.

Thinning Seedlings
As seedlings begin to grow, they may become crowded. It’s essential to thin them out to ensure adequate space for development. Leave about 2 inches of space between each plant to promote healthy airflow and sunlight exposure, which are critical for your ranunculus plants’ growth and vitality.
Fertilizing Strategies
Approximately three to four weeks post-germination, start implementing a fertilizing schedule. Use a balanced liquid fertilizer at half strength every two weeks to provide the necessary nutrients for your seedlings. As the ranunculus plants mature, you can gradually switch to a full-strength fertilizer to support robust growth.
By closely monitoring the watering, thinning, and fertilizing of your young ranunculus plants, you’ll encourage healthy development and vibrant blooms in your garden.

Transplanting and Growth
Successfully transplanting your ranunculus seedlings is a vital step to ensure they thrive and develop into vibrant blooms. Proper timing, correct transplanting techniques, and understanding growth patterns are crucial factors that will support a rewarding growing season.
When to Transplant
Timing: You should plan to transplant your ranunculus seedlings when they have at least two sets of true leaves and the threat of frost has passed. This typically falls in the spring months when the soil is workable and temperatures are consistently above freezing at night.
Transplanting Process
- Preparation: Before transplanting, harden off your seedlings by gradually exposing them to outdoor conditions.
- Site Selection: Choose a location that receives full sun to partial shade, as ranunculus thrive with plenty of light.
- Soil Preparation: Ensure the soil is well-draining and rich in organic matter.
Steps:
- Water the Seedlings: Begin by watering your seedlings in their current containers to make the removal process easier.
- Dig Holes: Make holes in your prepared bed that are slightly larger than the root ball of your seedlings.
- Positioning: Carefully remove the seedlings from their containers, taking care not to damage the roots, and place them in the holes at the same depth they were growing initially.
- Spacing: Space the seedlings about 6 to 8 inches apart to allow for expansion.
- Soil Contact: Backfill the holes gently and press soil around the base for good contact.
- Water Immediately: Water the transplanted seedlings thoroughly to settle the soil around the roots.

Growth and Development
Crucial Factors for Growth:
- Sunlight: Ranunculus requires a full sun position to flourish and produce the most vibrant flowers.
- Temperature: These plants prefer cooler growing conditions and will stop blooming when temperatures consistently hit 80°F or higher, typically in early summer.
Progression: After transplanting, ranunculus seedlings will begin to establish their root system and develop more foliage. Flowering usually occurs in the late spring or early summer following the transplant, provided the plant’s needs for sunlight and temperature are met. Regular watering and feeding can encourage robust growth and a better floral display.
Harvesting and Enjoyment
Once your ranunculus flowers have bloomed, it’s time to harvest them for your enjoyment. Carefully cutting and arranging them into bouquets can enhance their beauty and extend their elegance to your indoor spaces.
Cutting Ranunculus Flowers
To cut ranunculus flowers, select blooms that are just beginning to open. Use sharp, clean scissors or garden shears and cut the stem at an angle about 12-15 inches below the flower. Cutting at an angle increases the surface area for water absorption, ensuring your flowers stay hydrated longer once placed in a vase.
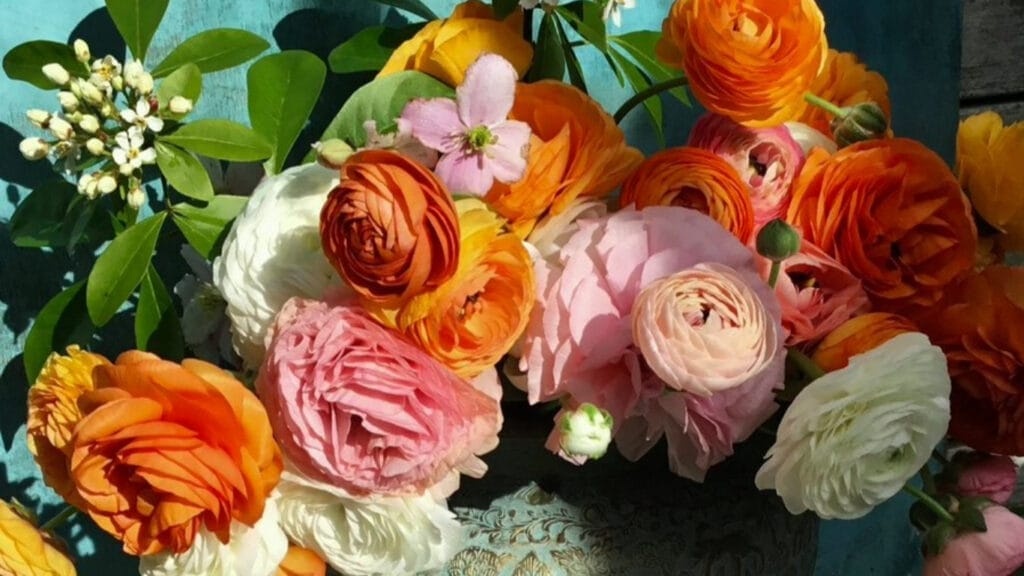
Arranging Bouquets
- Selecting Blooms: Choose a variety of colors and stages of bloom for visual interest.
- Arrangement: Start with a focal flower, then add supporting blooms around it in groups of three for balance.
- Fillers: Incorporate greenery or smaller flowers to fill gaps and add texture.
Arrange your bouquet while the stems are under water if possible to prevent air bubbles from entering the stems, which can reduce water uptake.
Storing and Maintaining Cut Flowers
- Vase: Use a clean vase and fill it with room-temperature water.
- Preservation: Add a flower preservative to the water or make your own with 1 part soda, 1 part vinegar, and a few drops of bleach.
- Refresh the water every couple of days and re-cut the stems to maximize the vase life of your flowers.
Keep your vase in a cool location out of direct sunlight to help your ranunculus cut flowers maintain their color and structure for as long as possible.
Frequently Asked Questions
Embarking on the journey of germinating ranunculus seeds can pose a few questions. In this section, you’ll find clear and concise answers to some common curiosities.
What is the typical germination time for ranunculus seeds?
Ranunculus seeds generally take about 15 to 20 days to germinate. However, maintaining the right soil temperature of 60-65°F and ensuring the seed-starting mix is moist will contribute to a successful germination process.
Is it necessary to soak ranunculus seeds before planting them?
No, soaking ranunculus seeds before planting is not necessary. The seeds require light to germinate, so instead of soaking, you should press them gently into the soil surface ensuring they remain exposed to light.
How can you collect seeds from a ranunculus plant?
To collect seeds from a ranunculus plant, wait until the petals fall and the seed pods (located at the center of the spent flower) dry out. Carefully remove these pods and open them to collect the seeds inside.
Do ranunculus seeds require darkness to sprout effectively?
Contrary to requiring darkness, ranunculus seeds actually need light to germinate effectively. Therefore, they should not be buried under the soil but lightly pressed on top of a well-moistened seed-starting mix.
What’s the best way to grow ranunculus in pots?
When growing ranunculus in pots, use a pot with drainage holes and fill it with a seed-starting mix. Maintain an even soil temperature around 60°F and keep the soil moist but not waterlogged. No light is required until foliage appears.
Can ranunculus be grown from cuttings, or is seeding a better option?
While it is possible to propagate ranunculus by cuttings, growing from seeds is generally a more reliable method as it ensures genetic diversity and better plant vitality. However, if cuttings are taken properly, they can also be a successful propagation method.
You May Also Like:
Spectacular Results: How to Germinate Kangkong Seeds Fast!
How to Germinate Quandong Seeds: Secrets Revealed!
10 Benefits of Elderberry Extract: Boost Immunity and Overall Health!
Unleash The Power of Ashwagandha For Anxiety, Stress, Testosterone And Sleep!
How to Germinate Soursop Seeds: The Secret To Successful Sprouts!

